This is one of two things I have
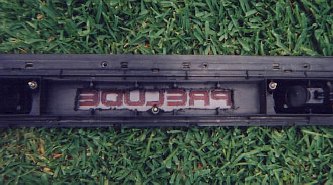
done so far to make my car unique. I had seen
everyone talking about lighting up the center
section on a 2gen/3gen, but no one had actually
done it yet, or even attempted it that I know of.
When I decided to go for it, it was a rather
spontaneous decision, because if I had planned it
out I would have most likely changed my mind.
Ended up being a 6+ hour job. I figured I'd go
ahead and put together something of what it took,
just in case anyone else would like to do it.
But, if you do decide to do it, consider yourself
warned, this is something that once started, you
can't go back. Not easily anyhow. And just the
same, --Take Your Time--, if you mess up at
particular parts, you will regret it. So, for the
brave, here goes... oh and remember, this only
applies to the 2gen dual carb models.
First, the tools. I scavenged for
whatever I could, and they worked well enough,
though a bit slow and crude. If you have access
to something better, then you would be doing
yourself a big favor, especially something to cut
metal at ~90 degree angle. Here is what I used :
..........- good
strong drill, with about a 3/8 or 1/2 bit
..........- hacksaw
..........- channel
lock pliers
..........- hammer
..........- flathead
screwdriver
..........- small
sharp knife with smooth edge (no nicks in it)
..........- dremel
with spherical shaped high speed cutter
And let me say this is again.
This is -really- crude. But it is pretty much the
only way to do it. If I had a better way to cut
the metal it would have looked nicer. Then again
you can't see it anyway. Someday I'll actually
finish the trunk and carpet everything. I plan on
making a long cover to go across the inside front
of the trunk so none of it will show.
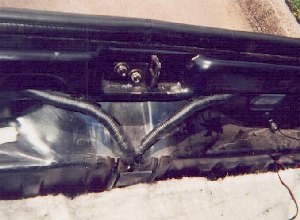
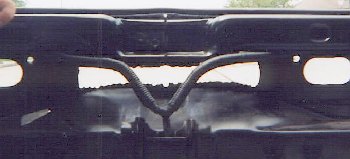
|
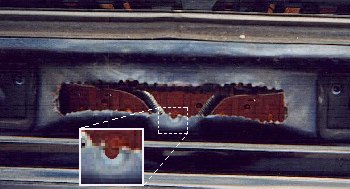
| Also, you shouldn't go below the hole for the
middle bolt of the center section. I cut it right
in half, but there is still plenty left to keep
it tight (inset, and I just really wanted to do
that :). I have never had any seal problems, even
though I fully expected to. If you do, let me
know what you fix it with. I have ideas but I'm
not sure how practical they are. |
 |
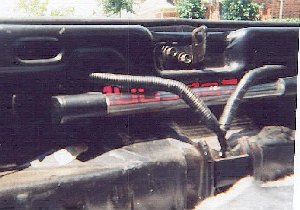
it's just a quick
wire up to the driving lights. So it comes on
with them when you turn on the headlights. The
last picture is actually a good one of how it all
comes together. Here at least you can see how
well the light does pass through. I'm gonna do
some more cutting sometime and turn the tube
around so it will be a little brighter. But it is
already as bright as the driving lights.
Thats pretty much it. It works
very well and it's always the first thing I show
off about my car.
If you have any Questions, I'd be glad to help. As long as I get
credit for being the first :)
|